
Congratulations! You’ve finished your book, and you’re ready to upload it to Amazon! But, wait. What exactly do you need to do? And how complicated is it? Is there a strategy that will help you do this the “right” way? The thought of launching your one little book into a roiling sea of millions of books might give you pause.
Will it bob on the surface like a shiny metal buoy, catching the attention of potential readers? Or—horrors—will it sink like a lead weight to the murky depths and lay buried in obscurity? Surely, there must be some smart way to publish a book on Amazon to make it seaworthy (or, to be more literal—”see” worthy!).
This post isn’t a step-by-step guide on how to upload and publish your book. Walking through the KDP portal is fairly straightforward. What really matters is publishing your Kindle ebook strategically.
(This post is focusing on ebooks, but the strategies will apply to your paperback version as well, should you choose to create one.)
What To Think Of Before Getting Started
You want new readers to find and purchase your book—you don’t want to be on Amazon just for the sake of being on Amazon. What’s the best way to get the consistent stream of sales successful self-published authors boast about? The answer should be obvious: by focusing on making your book discoverable.
With more than 6 million books already published on Kindle, and an estimated 50,000 new Kindle ebooks published every month on Amazon, you need to do everything you can to be discovered. And in this post, I’m going to show some simple tactics that will help you do just that.
As soon as I started implementing these tactics with my own self-published books, I saw incredible results:
- My books hit the top of the category lists (top ten) within 24 hours of putting them up for sale on Amazon before I even sold one copy. And I’ll show you how your books can do the same.
- My books populated in the “hot new releases” feature at the top of the search pages for categories before I even sold one copy.
- My books continue to populate in the top-ten search results indefinitely when the main keywords are typed into the search bar in the Kindle or Book store and I click on the search icon.
I’m not telling you that to brag but rather to help you understand that there are specific steps you can take to give your book the best chance of being found by your target readers on Amazon.
Now, there’s no guarantee that you’ll become a best seller or sell thousands or even hundreds of copies if you implement these secrets. I’d be lying if I said that.
But what I can guarantee is you won’t have a chance at getting sales from new readers browsing Amazon for books like yours if you don’t implement these. 🙂
Before we dive into the first secret to selling big on Amazon, there are two vital things you need to know to succeed:
1. Marketing a book on Amazon is similar to marketing any other product on the internet.
If you want to be discovered and sell well, you need to think like a marketer. Your books are products, and you’re selling them to a consumer.
As much as we authors would like to think our novels or nonfiction books will sell themselves, they won’t.
Needless to say, you need a terrific title and cover design that will be just right for the genre of your book.
2. You need to write a great book. Writing a book that fills a need or a niche (appeals to a specific market of readers) is the best way to ensure big sales.
Don’t think that if you write a mediocre book it will sell big on marketing alone. It may for a short while, but what matters in the long run is your reputation for crafting great books.
Along these lines, all your promotional materials—back-cover copy, Amazon descriptions, blurbs—should all reflect quality.
This means all content should be edited and proofread to perfection. And make sure it advertises your book honestly.
With a great book and a marketing mind-set, you’re ready to use these tips to maximize your sales on Amazon.
Why Should Authors Publish on Amazon?
If you have to ask this question, you probably have been living on the moon or deep in a forgotten jungle.
But since you asked, know that estimates hover at around 74% (at least as of 2015, and I’m guessing it’s only gone up) of all ebook sales going to Amazon.
That equates to about 71% of all money spent purchasing ebooks.
In other words, Amazon is where the majority of readers go to purchase books.
While there are definitely pros to having your book available across many platforms, some authors choose to go exclusively with Amazon (at least for ebooks) in order to be in KDP Select, which is what I do with most of my books.
Why go exclusive? Because Amazon pays you for page reads.
When someone buys your Kindle book, you get paid for every page that is read (the first time only).
I have experienced many months in which I made three times (or more) the revenue on my page reads than I did on my book sales.
On average, for example, with one of my 400-page books, I normally get paid somewhere around a half-penny a page (the pool that determines the per-page read payout rate varies month to month).
That means a “bonus” of $2 a book, in addition to my $3-$4 of royalty I get from my book sale.
It’s hard to give that up (not to mention the additional revenue I get from having my books in Kindle Unlimited, which is a lending library that also pays royalties).
So let’s dive into 8 simple steps that will give your book the best chance to be discovered.
How to Publish a Book on Amazon in 8 Steps
Step 1: Create Your KDP Account
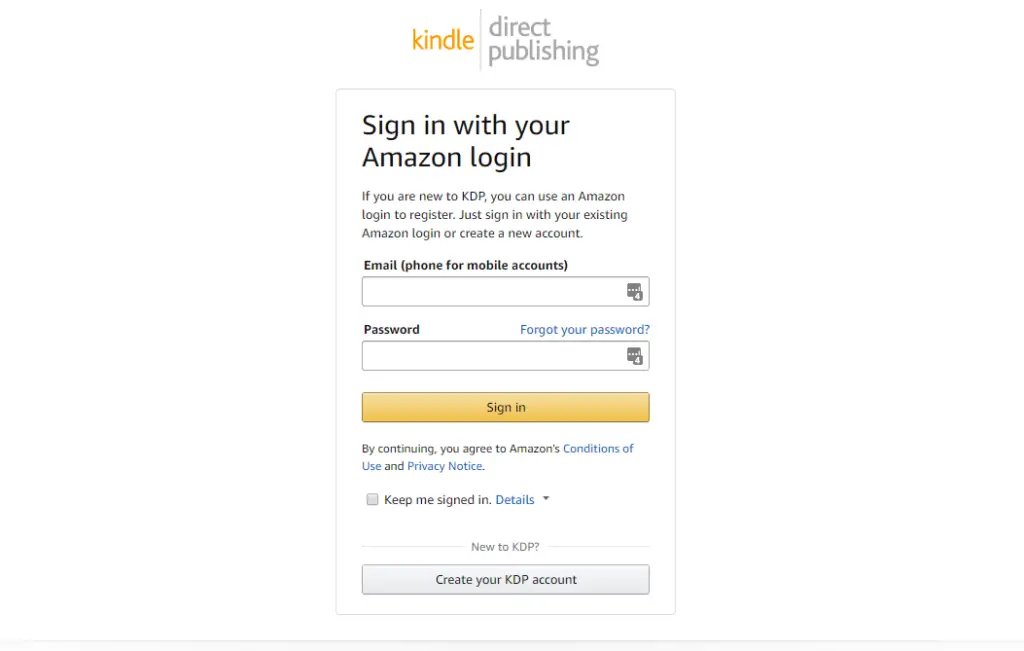
Step 1: Head to the KDP homepage and click “Sign up”.
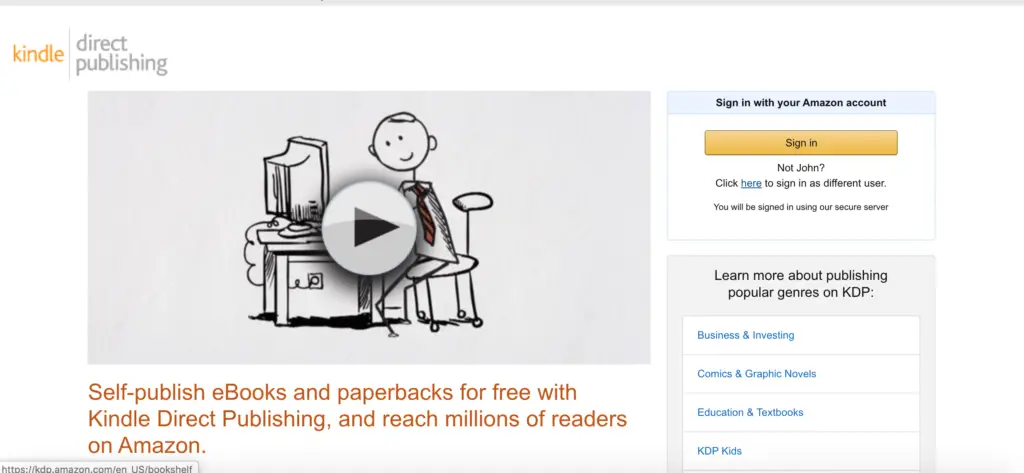
Step 2: Sign in with your Amazon account or click “Create your KDP account” at the bottom. Simple!
Here’s what the KDP dashboard looks like:
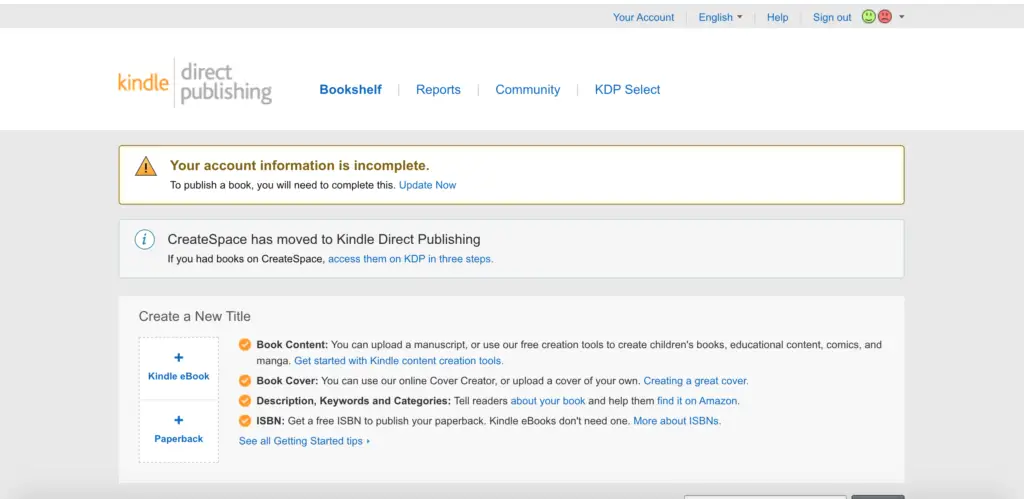
Nothing to get intimidated about, and it only takes a minute!
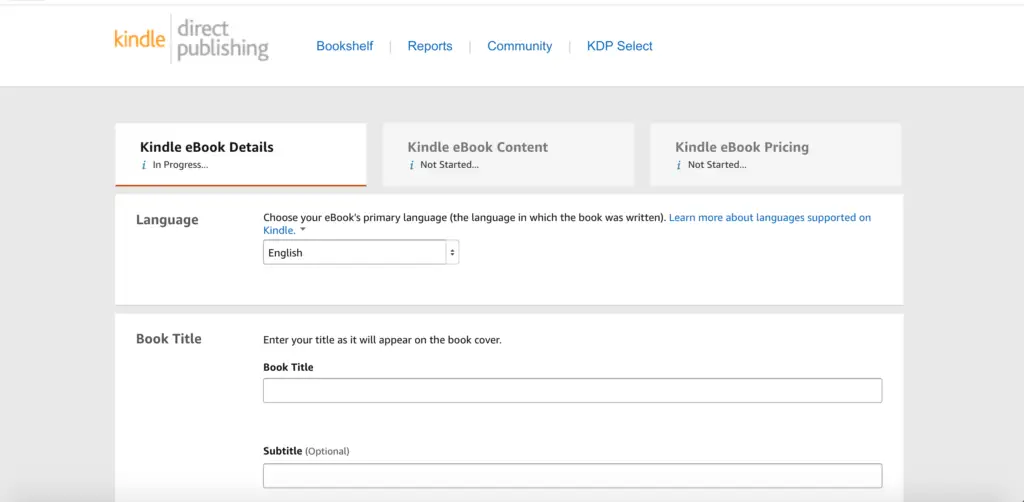
Step 2: Craft an Optimized Title for Your Book
The first step in adding your book to your KDP account is filling in your title and subtitle (optional).
These elements play a vital role in how many sales you can generate—it sells potential readers AND helps you show up in Amazon’s search engine.
So, I recommend spending time coming up with the best title possible. If you rush through this process, it will show in your revenue numbers.
To help you, I’ve written an in-depth blog post on how to create book titles that sell.
You can read it by clicking here.
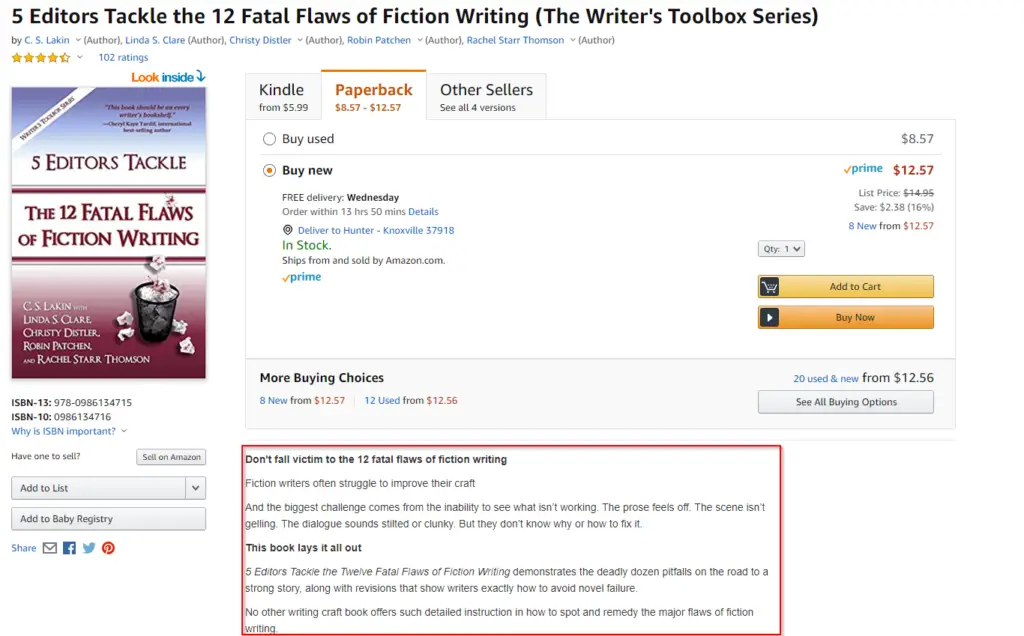
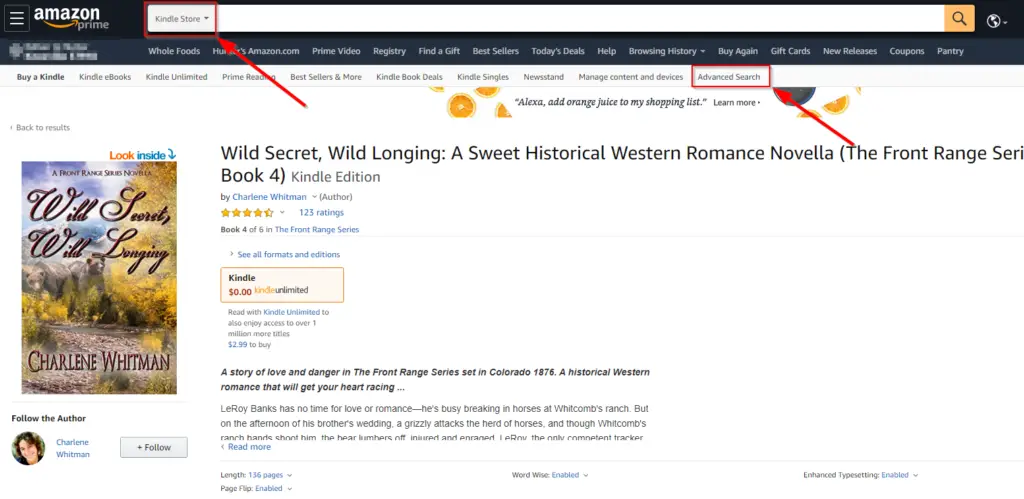
Step 3: Craft an Optimized Description for Amazon
Next to having a terrific cover and title, your Amazon description (which goes on your book’s product page) is the most important item to work to perfection.
Why is this so important?
Because it’s your sales pitch. And if you merely toss in a line or two describing your book, you’re wasting your most precious opportunity to convince a potential reader to consider your book.
Compare this to an agent saying, “Tell me about your novel. I’ll give you five minutes,” and all you do is give her a one-sentence pitch.
What? She’s opening the door to a great opportunity, and all you’re going to do is peek inside?
No, you want to go all-in and use up every second to explain how wonderful your book is.
I gave a pitch to a top acquisitions editor of one of the biggest publishing houses in the US. It moved her so much she started to cry.
She gave me the opportunity to tell her about my novel, and since she didn’t shut me up after a minute, I kept talking. I shared with her a key moving scene in the novel I was passionate about.
Not only did she cry and say, “You give a great pitch,” she also ended up acquiring my book and awarded me a five-figure advance and a publishing contract (which to me was a huge deal!).
What do you think would have happened if I’d only given her a one-sentence summary of my novel? We both know that answer.
The point?
That description field is your BIG chance to convince a potential customer to buy your book.
From there, she’ll maybe look inside (we’ll talk about that feature later). But she isn’t going to buy that book unless your description sells it.
So make that description field zing!
Here’s how:
1. Use all the characters allotted. Put in your top three keyword phrases multiple times. BUT be sure you do it tastefully and in context. Amazon and customers will consider it spam if you just dump keywords in all over the place. You can write sentences like “See what these reviewers have to say about this sweet Western romance: . . .” Or you can start off your description with a line like: “Heartbreak and Hope join hands in this new sweet historical Western by . . .”
2. Use HTML coding to make your description stand out (such as italics, bold, strong headers). This really makes your description stand out.
3. You can use a keyword category phrase as your subhead. Many authors do this. They’ll have a title like “Death Takes a Hike” and for the subhead they’ll use “A Noir Suspense Thriller.” However, this can be a bit tacky, so consider it wisely.
4. Don’t use Author Central to put in your description copy. Why? Because you can’t use HTML as well there for your description. And KDP allows you to use 4,000 characters for your description. Author Central has the same description box, but only allows you to use 2,400 characters (about 420 words instead of 700).
And once you go into the description field there, you will from then on be limited to 2,400 characters. This is a funky quirk about Amazon.
Here’s what Amazon wrote to me when I checked to confirm this is still the case:
“When an author writes a description in Author Central, it will override a description in KDP. However, it doesn’t work the other way around.” They added that if you write your description in AC and save it, “it can’t be overwritten on KDP.”
YIPES!
KDP and Author Central both are funnels to your book’s product page, but they are at odds, and until Amazon does a better job of integrating these two, you have to maneuver around the pitfalls.
Amazon also says, “Best to write a description in KDP as an author can use more characters and it’s easier to edit.” I can wholly attest to the latter. I can’t tell you how many times I’ve tried to get my formatting right in AC in the various fields I try to fill out, only to have them show up wonky (and who knows why that is?).
The key is: don’t sacrifice legibility for searchability.
Don’t come across as spamming with keywords. It will turn customers off.
Step 4: Choose the Best Keywords and Categories for Amazon
Keywords are one of the most important factors to selling well on Amazon.
But how do you decide which keywords to use in your KDP page?
Contrary to what Amazon recommends, your keywords should not be obscure or highly specific to your plot or characters …
They should include your genre and subgenre categories.
Think about what readers might type into the search bar to find a book to read. You want your keyword phrases to be as relevant as possible to your book.
Search engines will put the most relevant results at the top.
No one who is looking for a historical romance is going to type in “Greeley Colorado” or “veterinarian hero” (elements of my book Colorado Promise), for example.
Yet, these are the kinds of keywords Amazon recommends you use to stand out.
Sure, if you use them you’ll show up if someone is specifically looking for your book.
But most of your potential customers are just looking for a book in general categories.
So, knowing that your genre plays a huge role in which keywords you should pick, here are a few tips on finding the best keywords:
- Use longer, multiple-word phrases.
- Don’t use the same words in a different order as one of your keyword phrases, such as “Sweet Historical Western Romance” and “Historical Sweet Romance Western.”
- Play around with your genre and subgenre keywords by starting to type them into the search bar for the Kindle store (be sure you click on the Kindle store first, or if you are focusing on placing a paperback book in the rankings, choose “Books”).
- If your genre is historical Western romance, for example, when you start to type in historical, notice what populates:

- Then see what happens as you type in “historical a.” You’ll see a whole list of keyword phrases that begin with historical a, such as historical action, historical adventure, historical African American, etc. “Historical action” generates 26,000 results (as of the time I wrote this) and “historical action adventure” generates 18,000. The more specific you can break down the search results, the fewer books you will be competing against. But this is just one small technique you can play with.
- Go through and type in your genre + various first letters and see if you can find more specific niches or subgenres your books will fit into, choosing the top-ranking results that populate. Note this doesn’t equate to sales. But think about it—the top results are what keywords are most searched, so when deciding on keywords for your book, you want to consider using these.
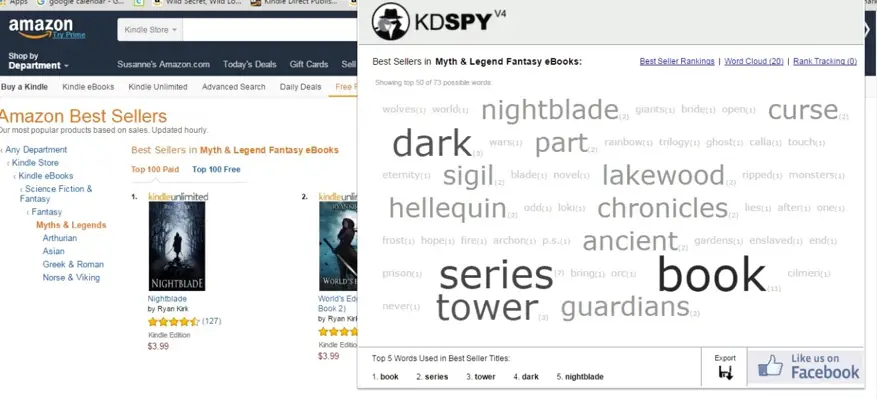
There are lots of ways to search for keywords and keyword phrases, but, hands down, the BEST way to do so is to use the Chrome tool KDSPY.
It’s not expensive and will give you current, vital data on which keywords are being used by best-selling books in your genre and subgenre.
I can’t emphasize enough how valuable this tool is. It will save you hours and hours of time and eliminate guesswork. You can BUY KDSPY HERE.
(Note: this is an affiliate link so if you purchase using this link, I will get a small commission at no extra cost to you. But rest assured I would recommend KDSPY regardless.)
This is extremely helpful in fitting your book into a genre that a lot of readers are buying.
Step 5: Creating an Amazon Author Central Page
A large part of how search engines rank results is by determining what a page is about. That’s why keywords are so important.
That’s why you want to make sure you use your keywords over and over (tastefully) in all fields of your product page, including Description, Reviews, Inside Flap, About the Author, etc.
Some of these fields are accessed via your Author Central (AC) page, but be sure to ONLY use the KDP portal for your description! (See warning in the first part of this post.)
Since KDP and Author Central are at odds about this description portal, and until Amazon does a better job of integrating these two, you have to maneuver around the pitfalls.
Here’s what you do:
- First, create your ebook on KDP. Fill out all the fields there, save, and publish.
- Once your book is live, go to Author Central (make sure you open accounts for both). There, you can click on “Books” and add your book.
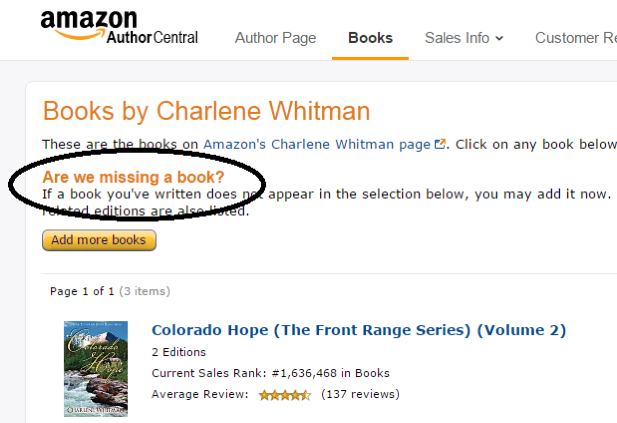
- Notice “Are we missing a book?” Click on that and type in your book title. When your book appears, choose it. It can take a few days for Author Central to add that book to your list of books.
- Once the book has been added, you can then go into all the various fields and add content.
- Leave the DESCRIPTION FIELD alone! DO add all you can to the other fields.
Why should you bother spending time adding reviews, Inside Flap, From the Author, etc.?
Because you need places to organically place your top three keyword phrases.
Remember, we’re all about discoverability, and the way you get discovered is by putting in your keyword phrases naturally throughout your product page.
Though, the main place you want your keyword phrases to show up is in the description field.
That area is what will SELL your book.
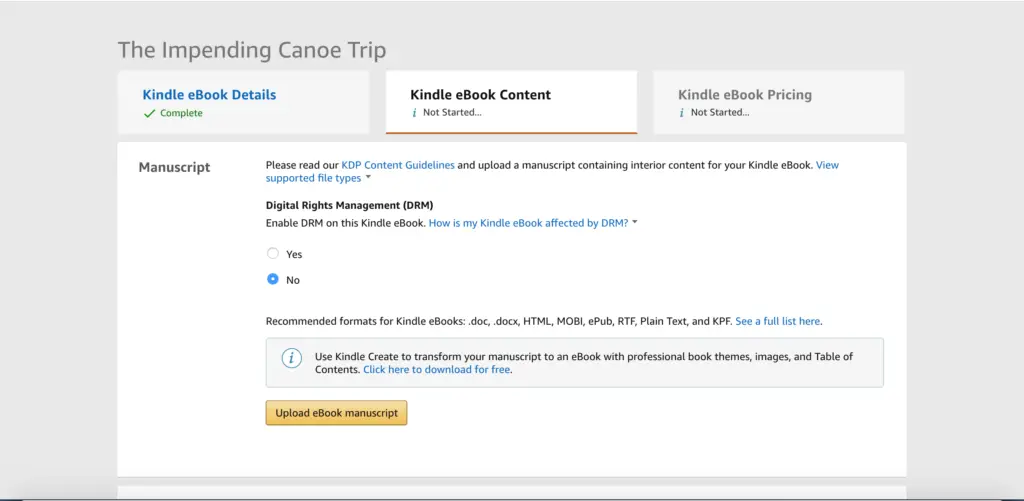
Step 6: Properly Format Your Ebook Manuscript
You don’t need to get complicated here. Amazon has a help page that might give you a terrific headache, but you will find some of the instruction helpful.
I’ve heard book designers recommend using specific fonts, and if you Google this, you’ll get a slew of suggestions:
- Arial
- Times Roman
- Caecilia (the default font in the Kindle Touch)
- Bookerley (default font in the Kindle Paperwhite)
- Georgia
- Helvetica…
Here’s the thing: you need to keep it simple because people read Kindle books across many devices in many countries.
I just use Times New Roman. The point size also doesn’t matter much because, if you know how a Kindle works, the reader can adjust the point size of the font for their best reading experience. Use single line spacing.
Don’t lay out your manuscript like a blog post, with block paragraphs (no indent) and line spaces between paragraphs.
Make it look like a book (I auto-indent .3”)! But don’t justify the text (which is what you do with a print book). Just use flush left.
Don’t have headers or footers or page numbers (because those don’t work on Kindle).
Again, keep it simple!
I put a line space before and after chapters, and I use page breaks (control or command + enter) at the end of chapters. But some authors don’t.
Smashwords has a great free style guide to help you format your ebook. Or you can read up on Amazon’s formatting suggestions.
Take some time to go through it and learn how to do this. Honestly, it takes me about 15 minutes to convert my manuscript that I wrote from double spacing to single and then lay it all out nice and simple.
Amazon prefers you upload a Word .doc or .docx or a KPF file created with Kindle Create. They do support other file types but with caveats, so if you don’t want to use a Word document for some reason, be sure to check Amazon’s info page.
Step 7: Upload Your Manuscript
Step 1: Log in to your Kindle Direct Publishing account.
Step 2: Click on the “+ Kindle ebook” icon to start uploading your manuscript.
Step 3: Fill out the information that applies to your manuscript.
Step 4: Click Upload. It may take a few minutes for it to process.
Step 5: Add information about the price of your ebook (more on this in a sec!) and royalty percentage gain.
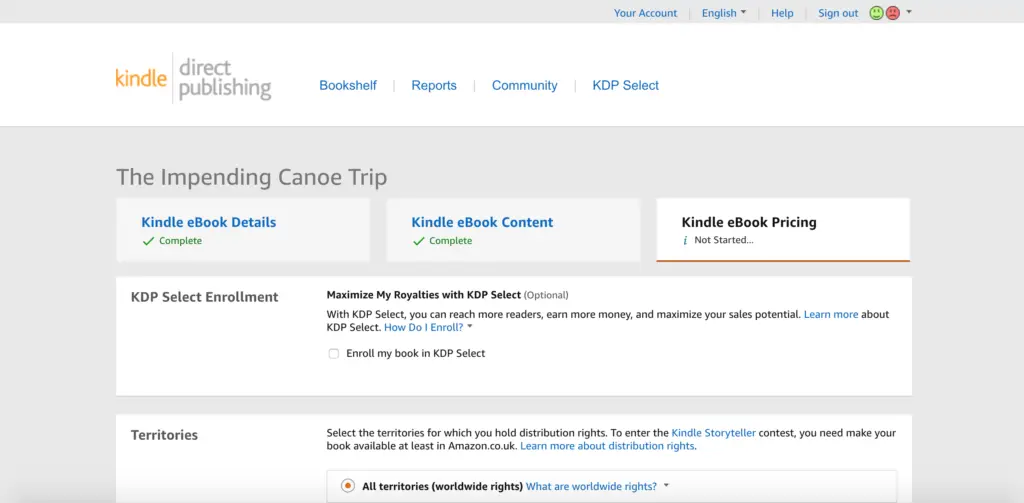
Step 8: Strategically Price Your Book
As with just about any advice I give, the best way to price your ebook (your “set” retail price) is to look at best sellers in your genre and price accordingly.
Traditional publishers tend to price ebooks much higher ($9.99+ US) than most self-publishing authors price ($2.99-4.99 US). You don’t want to set your price way out of range for your genre.
Of course, many authors price at $0.99, even as their fixed price, in the hopes of getting lots of sales, and some authors have become quite rich using this strategy.
Amanda Hocking was probably one of the first to set her first book in her series at $0.99 (subsequent books were priced at $2.99), and she made bank and more.
The downside to having a fixed low price is that it’s already “always on sale.”
When you have a standard retail price for your ebook—for example: $3.99—it affords you opportunities to put your book on sale at various times and on various sites.
There are lots of marketing strategies you can read up on. You have to determine what best appeals to you.
Keep in mind that if you price your book below $2.99, you can only garner 35% royalty sales of each ebook.
If you set your price at $2.99 or above, you can select your royalty option at 70%. Statistics show, across the board, that most ebooks sell at between $2.99 and $3.99.
When you upload your ebook, on the pricing page, you’ll find a section called “KDP Pricing Support (Beta).”
When you click on it, it will show you a graph estimating your sales potential at different prices.
I’ve often ignored the recommendation because, as I advised above, I checked the best sellers in my genre and the KDP recommended (ideal) pricing was way too high for my comfort level.
If your book is short—a novella of 20,000 words, for example—it’s best to price it lower than, say, your novel that sits at 100,000 words.
Again, check your genre. In some romance genres, readers expect an ebook with fewer than 50,000 words to be priced at $0.99.
In my 6-book Historical Western Romance series (under my pen name Charlene Whitman), I purposely wrote a short novella as both a loss leader on Amazon at $0.99 and a free giveaway (lead magnet) for anyone signing up for my mailing list.
My other novella in the series sits at about 50,000 words and is priced at $2.99. My (much longer) novels are priced at $4.99.
Also keep in mind that many people equate price with quality, which is why I never set my novels at a regular retail price of $0.99.
A potential customer, looking at comparative titles’ prices, might wonder if your ebook is either a short read or a lousy book because it’s so cheap.
If you sell your book on other platforms, make sure you price it the same. It’s not fair to have inconsistent pricing, and Amazon will drop your price if a customer reports a lower price elsewhere. Beware!
Conclusion
Publishing your ebook on Amazon might seem daunting, but just take it a step at a time.
First and foremost: write a great book and have it professionally edited!
Set up your KDP and Author Central accounts (easy peasy). Use simple formatting to get your ebook ready to upload, then fill out all the pertinent fields in the KDP portal.
Be sure you come up with a great title for your book, and don’t settle for a less-than-stellar cover. I like to say “a picture is worth a thousand sales”!
Your title and cover should (do I need to say it?) fit your genre and sound and look much like the ebooks gracing the best-seller charts.
Remember: it’s all about discoverability.
Do all you can by using these strategies and methods to give your ebook the best chance possible to pop up at the top of the search results when customers are searching for a book like yours!
It may take some effort and time to do these things, but it’s worth it, isn’t it?
How many months did you spend writing your book?
Yes, most of us authors hate marketing, but if our books sink to the bottom of the sea, those target readers won’t find our books.
And always keep this truth in the forefront of your mind: discoverability is everything.
Featured Photo by Mr Cup / Fabien Barral on Unsplash

Sell More Books
Enter your name and email below to get your free copy of my exclusive guide:
8 Simple Secrets to Big Book Sales on Amazon